Introduction
(How To Install Transition Plate Metal Roof)
transition plate metal roof is a popular choice for many homeowners due to its durability, easy maintenance, and low cost. However, if you’re not sure how to install this type of roofing material, it’s important to have the right knowledge and skills. In this blog post, we’ll provide a step-by-step guide on how to install a transition plate metal roof without any specific instructions or diagrams.
Materials Needed
Before you start installing your transition plate metal roof, you’ll need the following materials:
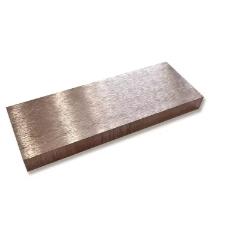
– Transition plate metal sheets (or other appropriate sheeting)
– Fasteners such as screws or bolts
– Roof flashing
– Flashing nails
– Roof primer
– Caulk
– Adhesive
Instructions
1. Gather Your Materials
To begin, make sure you have all the necessary materials ready. Check the dimensions of your roof to ensure that you have enough transition plates and fasteners. You should also have a list of all the tools and equipment you’ll need to complete the installation.
2. Prepare Your Work Area
Choose a safe and level area to work in. Cover any furniture or appliances that may be affected by the installation process. Make sure there are no loose objects lying around that could fall off during the installation.
3. Lay the Sheets
lay down the transition plate metal sheets on a flat surface. Be careful when handling them, especially if they are heavy or extra large. Use a measuring tape and ruler to ensure that the sheets are laid flat and square.
4. Attach the Sheets
Next, attach the transition plate metal sheets to the existing shingles using the fasteners provided. Follow the manufacturer’s instructions carefully to ensure that the sheets are securely attached. Use screws or bolts to hold them in place, depending on the type of transition plate metal roof you have.
5. Cut the Finishing Material
If you have any finished material, such as gutters or fascia, cut them to fit over the transition plates. Be careful when cutting them to avoid damaging the transition plates themselves.
6. Install the Flashing
Install the flashing above the transition plates to secure the sheets in place. Use a utility knife or screwdriver to cut the flashing along the edge of the transition plates.
7. Apply Flashing Nails
Once the flashing is installed, use roofing nails to secure it in place. Make sure that the nails are evenly spaced throughout the flashing, and that they penetrate the flashing material deep enough.
8. Apply Caulk
Finally, apply caulk around the edges of the transition plates and flashing to seal the gaps and create a tight seal between the different surfaces.
9. Clean Up
After the installation is complete, take the time to clean up any debris or oversights. Make sure that all the fasteners and screws are properly tightened, and that the flashing and caulk are applied correctly.
Conclusion
(How To Install Transition Plate Metal Roof)
, but with the right materials and tools, it can be a straightforward and effective process. By following these steps, you’ll be able to install your transition plate metal roof safely and efficiently. Remember to take your time and to be patient throughout the installation process, so that you can enjoy the long-term benefits of a well-installed transition plate metal roof.